Microsoft Add-in Authentication
Microsoft Add-ins offer you the ability to integrate your application with popular Microsoft software such as Word, Outlook, and Excel.
This guide offers two methods of integrating PropelAuth with your application, allowing you to choose which method is best for you and your users.
-
User Generated API Keys - Use API Keys to authenticate your users in your Add-in. We'll design a flow to guide your users in creating an API token, pasting it into your app, and validating it in our backend.
-
Next.js - Use our Next.js library to quickly and easily add authentication to your Add-in.
User Generated API Keys
PropelAuth gives you the ability to enable API keys for your users. This allows your users to easily generate their own API keys in the hosted pages. We can then use that API Key to make a request to your backend where we'll validate the API Key, generate an access token, and then store the access token in the frontend.
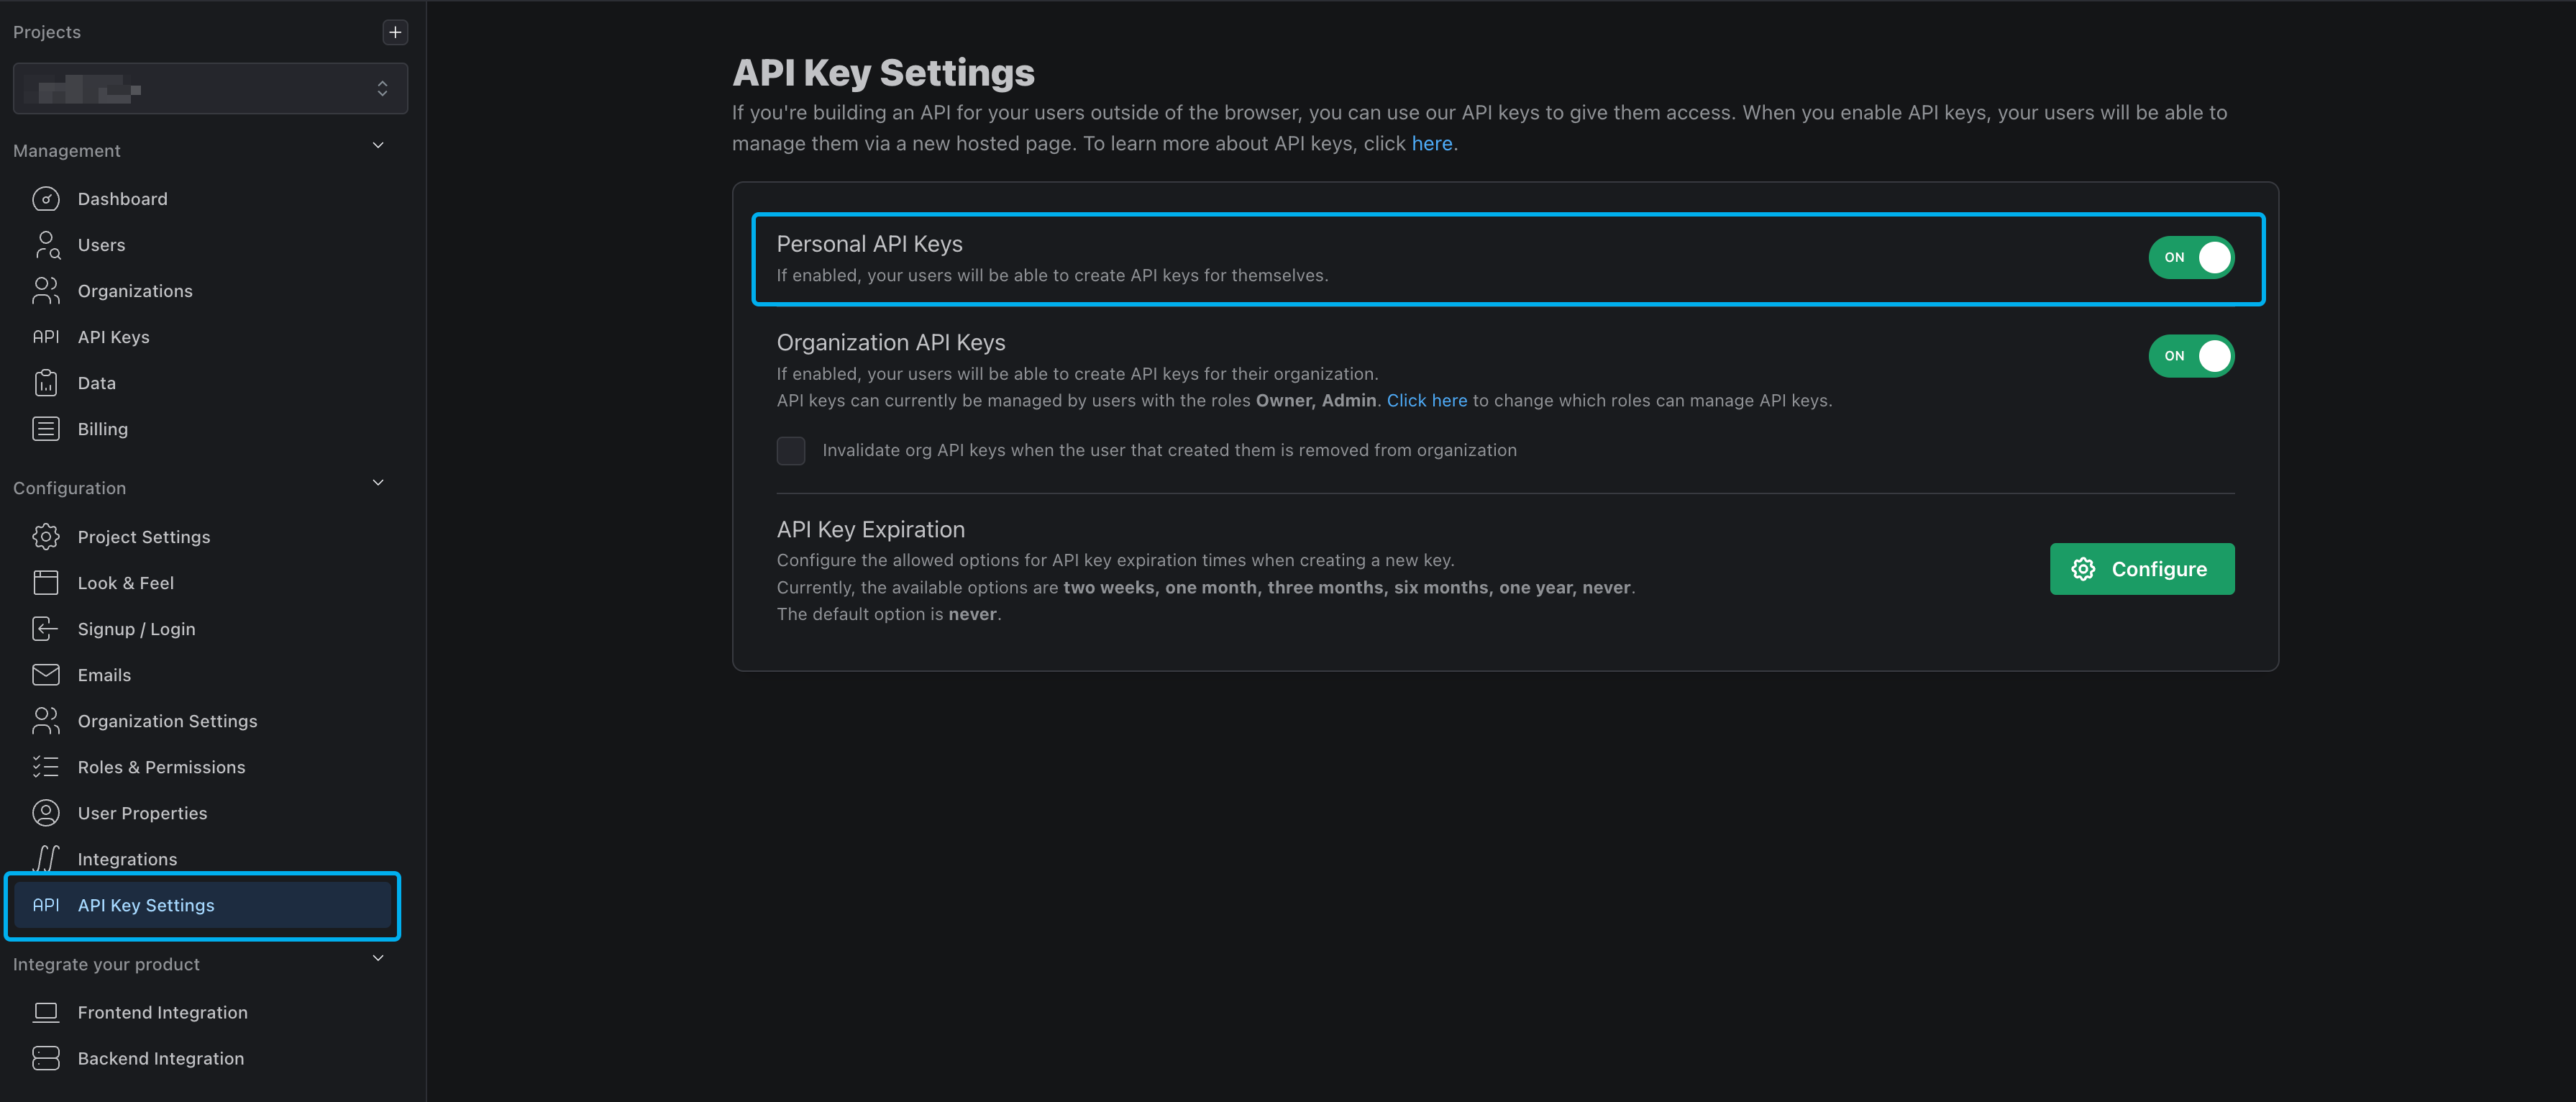
Before we begin, make sure that personal API keys are enabled via the API Key Settings page in the PropelAuth dashboard.
Setting Up The Backend
If you haven't already, head over to the backend quickstart guide or the reference docs to get your backend integrated with PropelAuth.
Let's start by creating an endpoint that accepts an API Key in the request body and returns an access token for that user. To do so, we'll use PropelAuth’s backend API to first validate the API key and then generate an access token for the user. In this example we'll be using PropelAuth's Express library.
app.post("/api/validate_api_token", async (req, res) => {
    const apiToken = req.body.api_token;
    try {
        const apiTokenResponse = await validateApiKey(apiToken)
        const accessToken = await createAccessToken({
            userId: apiTokenResponse.user.userId,
            durationInMinutes: 1440 // 24 hours
        })
        return res.json(accessToken);
    } catch (error) {
        return res.status(401).json({ message: "Invalid API Token"})
    }
});
Now that we have that setup, let's head over to the frontend to help the user generate their API Key.
Getting The User's API Key
When a user opens your Add-in for the first time, you can provide them a link to the hosted pages where they can generate their API key. Then, you can have the user copy and paste the API key into a text field.
const [apiKeyField, setApiKeyField] = useState("");

const handleTextChange = async (event) => {
    setApiKeyField(event.target.value);
};

return (
    <div>
        {/* This will open a new browser tab, ask the user to login, and then direct them
        to their account page to generate an API Key*/}
        <a href="{YOUR_AUTH_URL}/account/api_keys/" target="_blank" rel="noopener noreferrer">
            Click here to generate an API key.
        </a>
        <label>Enter your API Key</label>
        <input value={text} onChange={handleTextChange} />
        <button onClick={getAccessToken}>Confirm API Key</button>
    </div>
  );
Now we'll make a request to our backend to exchange the user's API Key with an access token. To make things easy, we'll be using axios to help us make the request.
Once we confirm the API key is valid and get the access token, we'll want to save them securely in our frontend. You can do so by using partition key from the Office JavaScript API library.
const [apiKeyField, setApiKeyField] = useState("Input here");

const handleTextChange = async (event) => {
    setApiKeyField(event.target.value);
};

async function getAccessToken() {
    const body = { api_token: apiKeyField };
    const config = { headers: { "Content-Type": "application/json" } };
    const response = await axios.post("{YOUR_BACKEND_URL}/api/validate_api_token", body, config);
    setInLocalStorage("access_token", response.data.access_token); // save securely in local storage
    setInLocalStorage("api_key", apiKeyField); // save securely in local storage
}

return (
    <div>
        <a href="{YOUR_AUTH_URL}/account/api_keys/" target="_blank" rel="noopener noreferrer">
            Click here to generate an API key.
        </a>
        <label>Enter your API Key</label>
        <input value={text} onChange={handleTextChange} />
        <button onClick={getAccessToken}>Confirm API Key</button>
    </div>
  );
Getting User Information
Now that we have the user's access token, we can quickly get the user's information by making a simple request to our backend. Let's start by adding an endpoint to our Express backend and use the requireUser middleware to both validate the access token and return the user's information to the frontend.
app.get("/api/get_user", requireUser, async (req, res) => {
    res.json(req.user);
});
On the frontend side, let's make a request to the backend and include the access token as a bearer token.
async function getUserInformation() {
    const accessToken = getFromLocalStorage("access_token"); // get from local storage
    const config = {
        headers: {
            "Content-Type": "application/json",
            "Authorization": `Bearer ${accessToken}`
        },
    };
    try {
        const response = await axios.get("{YOUR_BACKEND_URL}/api/get_user", config);
        // set somewhere, such as state
    } catch (error) {
        console.error("Error fetching user information:", error);
    }
}
And that's it! You'll want to add some additional error handling, retry logic, and refreshing the access token, but that should be a good start in setting up PropelAuth with your Microsoft Add-in.
Next.js Auth
Next.js and the PropelAuth Next.js library are a great and simple way to protect your Microsoft Add-in.
Setup is exactly the same as our quickstart guide but with one exception - adding an additional environment variable to your .env.
PROPELAUTH_SAME_SITE_COOKIE_OVERRIDE=none
This will override the cookie settings set by PropelAuth to Same-Site=none, allowing your app to be rendered in the Add-in iframe.
If you have any questions about getting your Next.js app up and running as a Microsoft Add-in, feel free to reach out to support@propelauth.com.